Many business owners prefer to sell their products online due to the growing number of online customers. Among the variety of eCommerce solutions, WooCommerce became the most popular one. 40% of online stores in 2021 use WooCommerce for their business. Over 5 million active plugin installations in WordPress show how much value it brings to both big and small e-commerce shops.
After the stages of web design and web development are over, and you have set up the WordPress website, it’s time to install the WooCommerce plugin and add products to it.
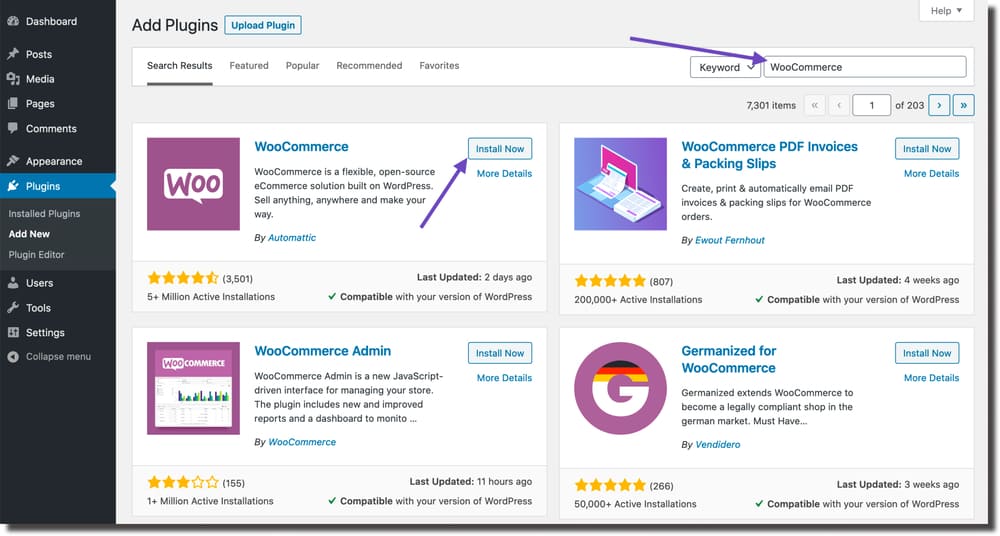
You can install WooCommerce plugin by logging in to your WordPress admin dashboard and going to Plugins. In the search bar enter ‘WooCommerce’, install and activate the plugin.
There are two ways to add products to your newly created WooCommerce shop: by manually adding each product and choosing its features or by importing a product csv file.
Let’s learn the manual method first to have a profound idea of how it all works.
How to add new product in WooCommerce manually
Navigate to products through your WordPress panel and click on “Create product”. That will bring you to the familiar WordPress interface where you should start with filling in the name of the product and the description.
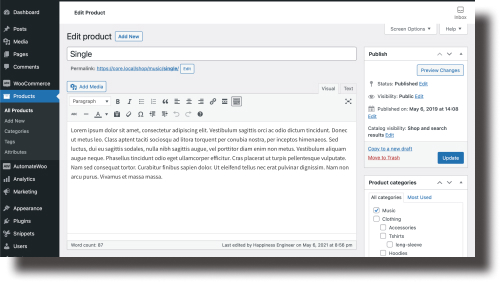
Then you should scroll down to the product data meta box to add all the essential data for the product.
Product type
Choosing the right product type in the beginning will save you a lot of time because, otherwise, after importing a bunch of products it will take a while to manually change this product attribute in the future.
- Simple – covers a variety of products that have no additional options. Choose this category if you are sure that the product is not going to evolve into having various combinations. An example is a particular book.
- Grouped – includes several related products to be purchased individually. You can only add simple products to it. For example, a set of tablespoons.
- Virtual – such products don’t need shipping. That can be a service of any kind. Choosing this type disables all the fields related to shipping, including the ones in cart and checkout.
- Downloadable – enables the field to add a downloadable file. After the purchase proceeds, the customer will get a chance to download the file by following the link in the order notification email. That’s the type of product for digital books, audio files, and photos.
- External or Affiliate – used when you want to add the product that is sold on some other website.
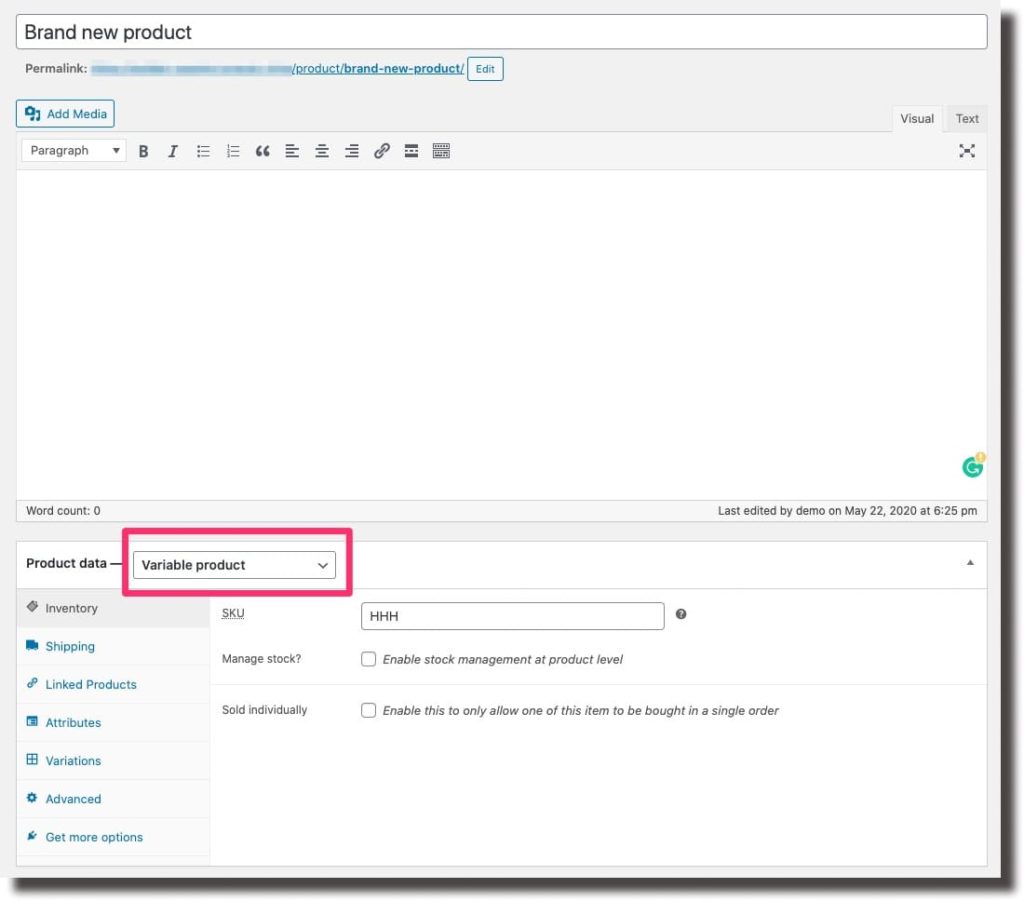
- Variable – allows you to add a product that comes in different variations. Each variation may have a different price, stock, SKU, etc. The most common example is a T-shirt that comes in different sizes, colors, and prints.
- There are other types of WooCommerce products that can be added by additional extensions (WooCommerce Subscriptions, WooCommerce Bookings).
Adding a Simple type of product
The description below applies to adding a Simple type of product as it covers the most important aspects of the process.
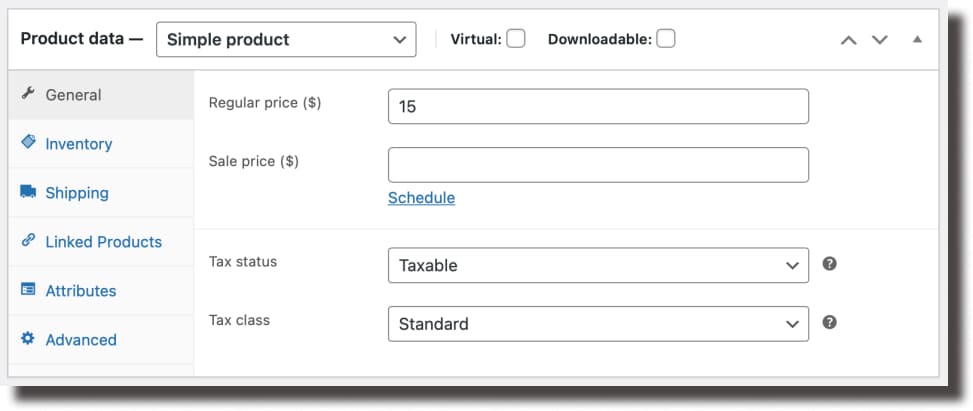
Add information on the General section: the regular price of the product and the sale price (can be scheduled if needed). Choose the appropriate Tax status and Tax class.
In the Inventory section, you can add SKU for the product. That is a unique identifier of the product. You can also enable stock management to have more control over the number of available products.

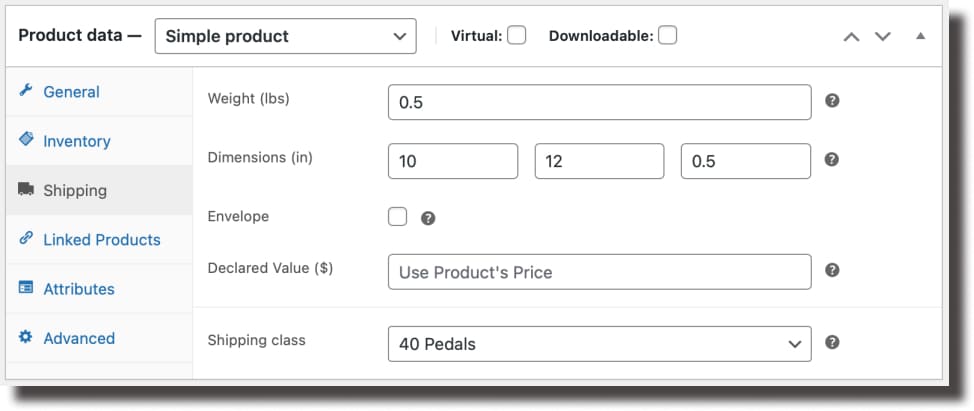
The Shipping section allows you to add the product’s weight and its dimensions. That is an important step if you are going to integrate WooCommerce with external shipping services.
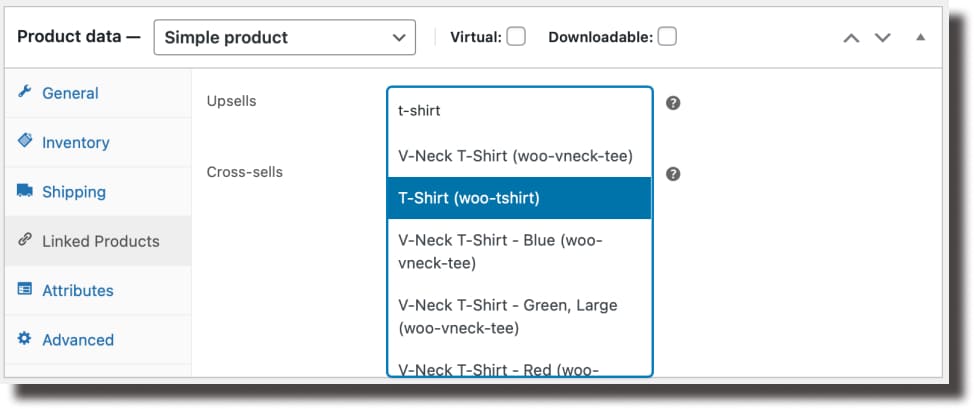
In the Linked products you can select products for the Upsell and Cross-sell.
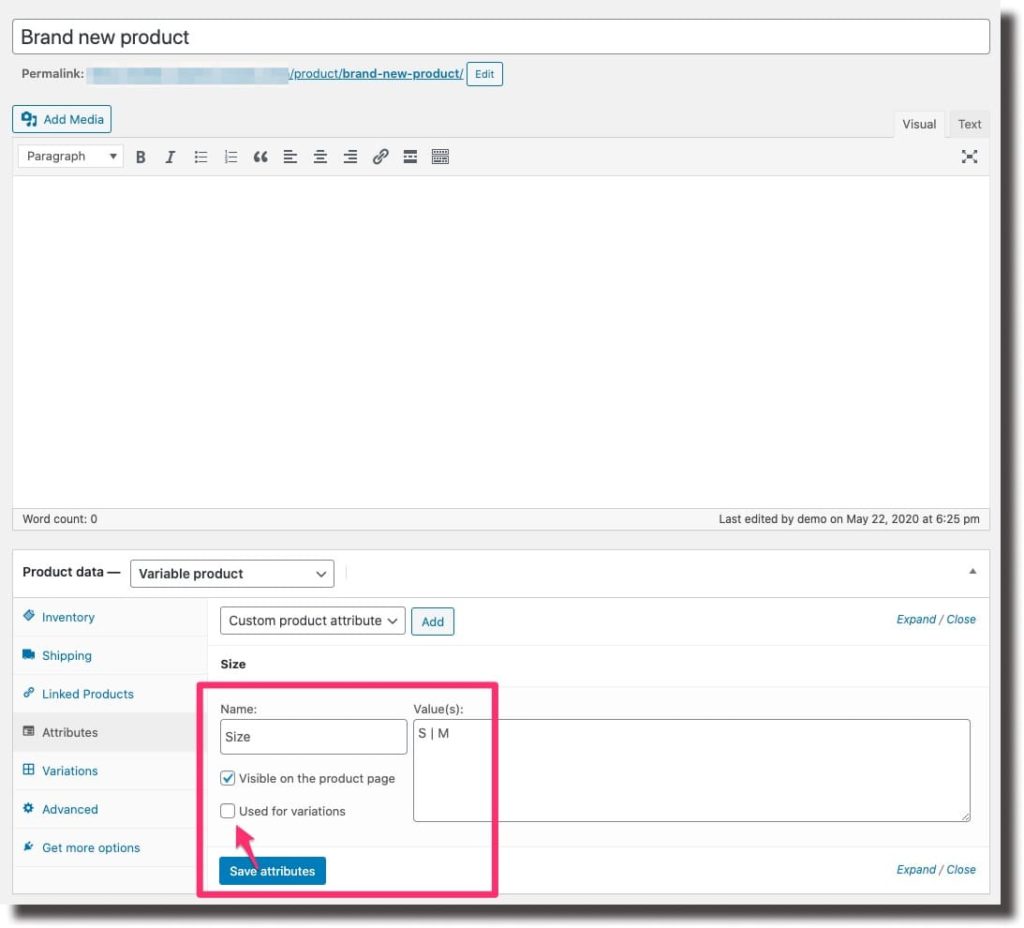
Attributes section is where you can add global attributes to the products that you have already added to the store or add custom attributes that will be available only to this product.
The Advanced section allows you to add the note with some important information for the customer to know after buying the product. It also gives options to specify the custom ordering position and to let the customers leave the reviews.
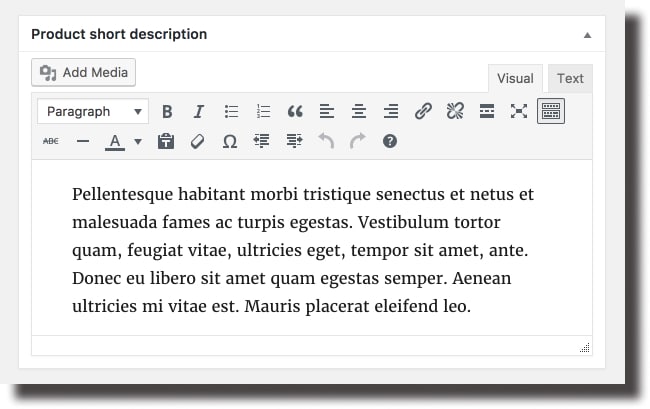
The Product short description field allows you to add the product’s short description that will be shown right next to the product thumbnail.
Taxonomies
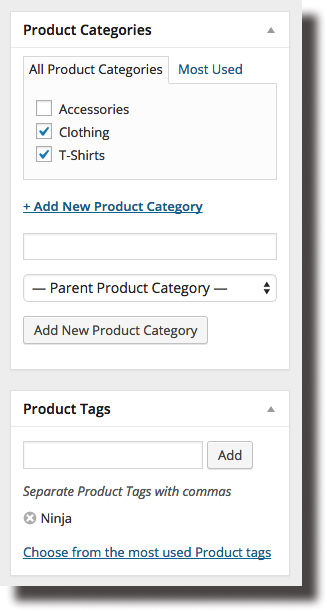
The next step is to choose the suitable category and tags for the products in the regular WordPress panels on the right side of the screen. Add the Product image or the Product gallery (if necessary). The Product image will be shown as the main image on the product page, and the images from the Product gallery will be the additional ones.
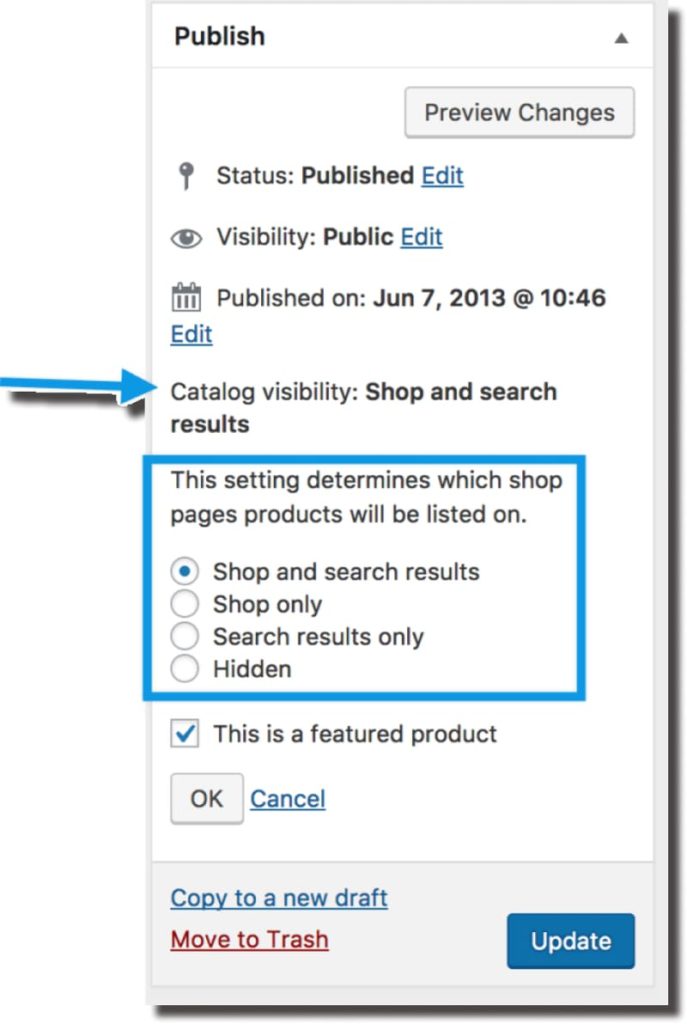
In the Publish panel, choose the right option in the catalog visibility to define where to show the product. You can define the product as featured to be shown on the homepage by clicking on the checkbox.
After filling in all these fields, you are ready to click on the Publish button to add this WooCommerce product to the store.
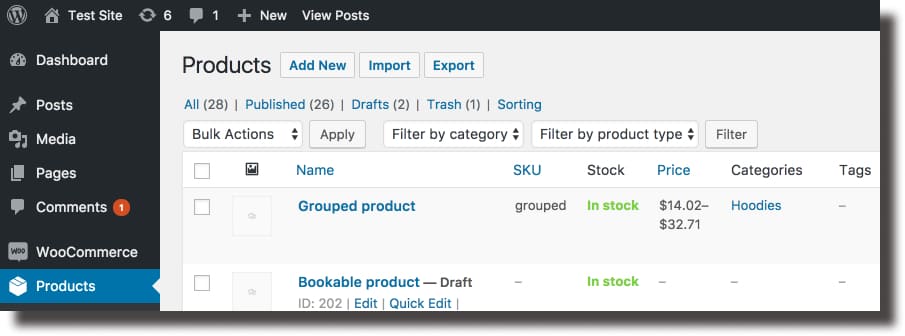
All the published products will be shown in the Products > All products on the WordPress admin panel. The Quick edit option allows you to change basic settings without opening a detailed product page.
How to import products in WooCommerce
Importing new products to WooCommerce is made by importing CSV files with all the necessary product attributes indicated in them.
Import New Products
New products can be added to WooCommerce by a CSV file with one upload.
1. In the WordPress Dashboard, go to WooCommerce > Products.
2. At the top of the page select Import.
You will see the Upload CSV File screen.
3. Choose the CSV file with the list of your products.

Here you can set a different CSV delimiter if your elements are separated by a character different from a comma.
4. At the Column mapping step WooCommerce will automatically match the Column Name with data from the CSV file to Fields.
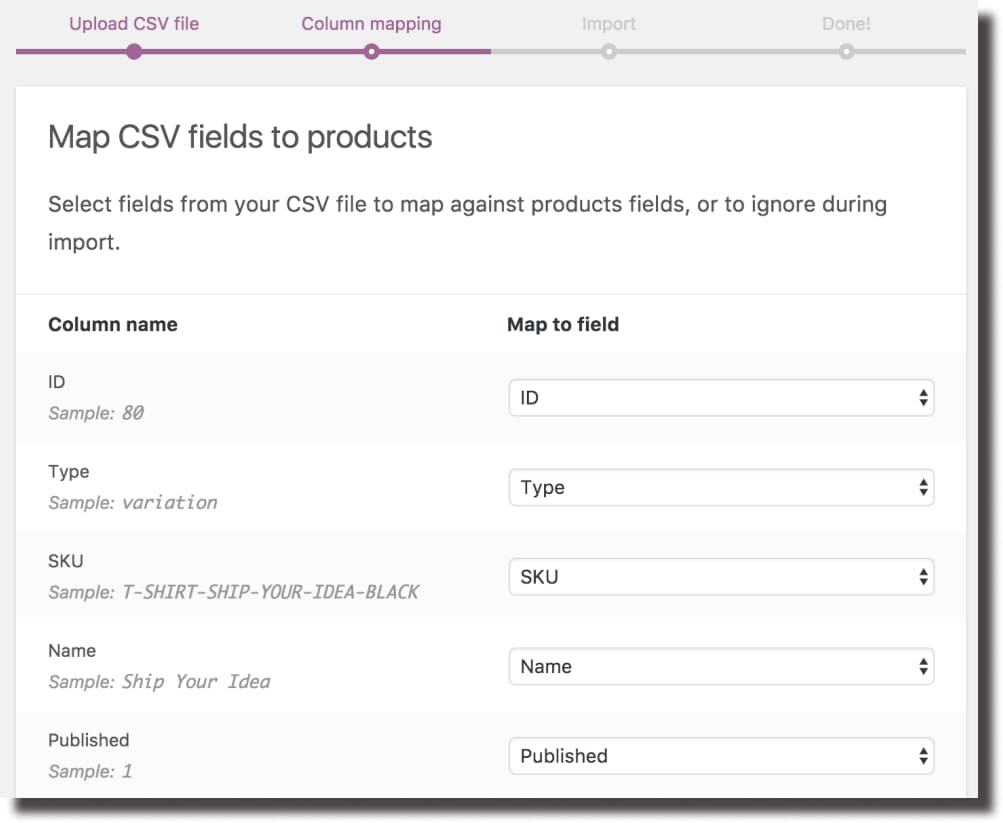
You can adjust the fields by using the dropdown menus or setting ‘Do not import’. The unrecognized fields won’t be imported by default.
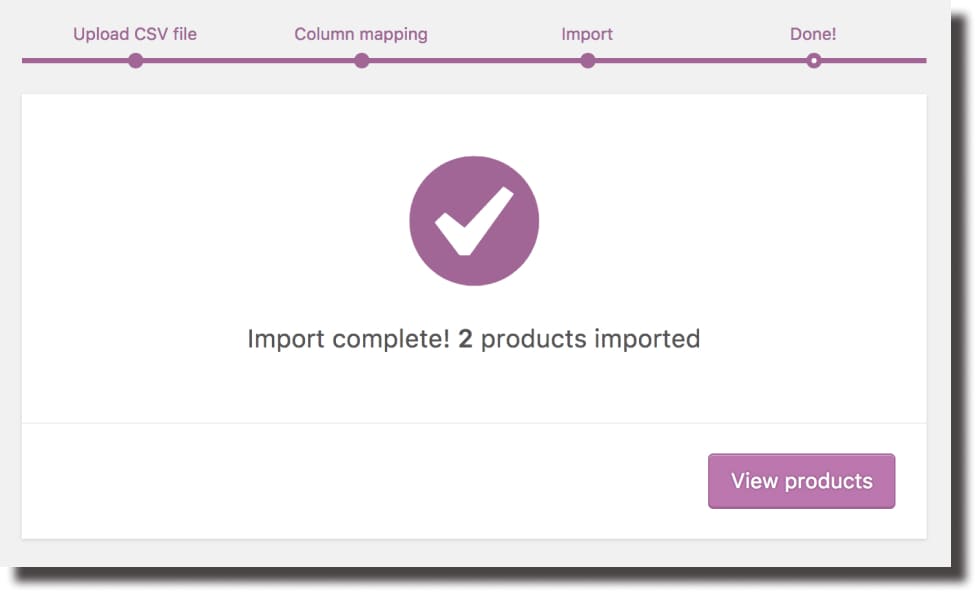
5. Click on Run the Importer to start the process and wait until it’s finished.
How to Update existing products
This option is used when the store owners want to update the products that were added before with some new information. For example, business owners can use it to add a new field for a brand, change tax class, or update a group of products for a special sale.
1. First of all, make a CSV file with the exact IDs and/or SKU of the products for the update. The importer will use them to match with the information of the existing products.
2. Then go to WooCommerce > Products and select Import.
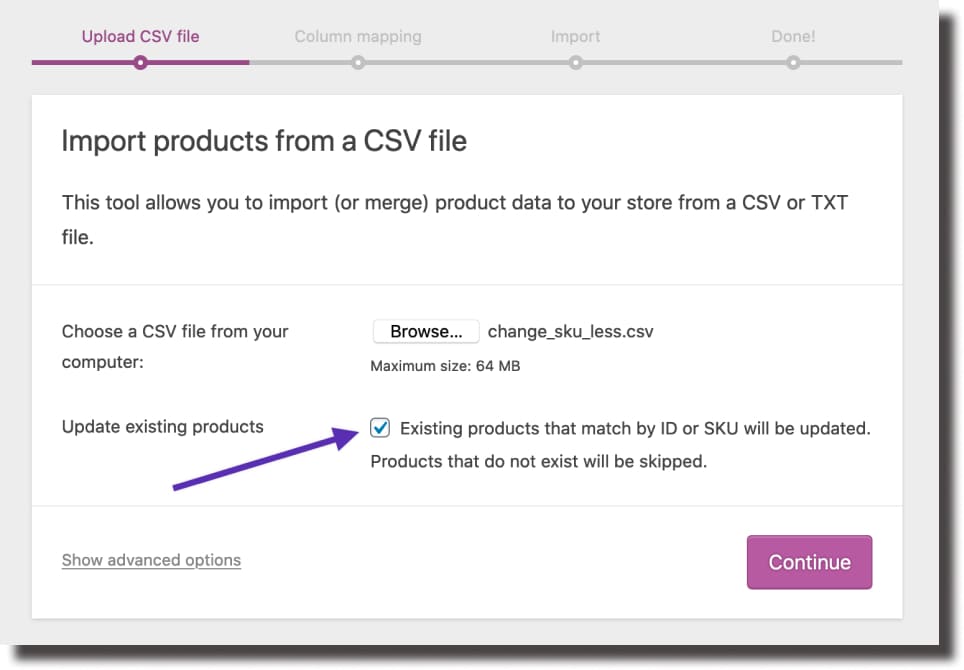
3. In the Upload CSV File screen choose the CSV file that you made and check in the Update Existing Products option.
4. The Column Mapping screen will automatically match the Column name with the Fields in your CSV file. So use dropdown menus to set the right fields or ‘Do not import’ if there is no need for that Field.
5. Run the importer and wait until it is finished.
How to use CSV importer to convert simple products to variable products
The CSV importer may also be used to convert the existing simple products into variable ones.
1. Create one simple product with SKU and price.
2. Go to All Products and export it using CSV Exporter.
3. Open the exported CSV file and add new data to convert the product from the simple to the variable one:
- 2 new rows
- 4 new columns (Attribute 1 name, Attribute 1 value(s), Attribute 1 visible, Attribute 1 global)
How to add new Size vatiations
If you are adding new Size variations it would look the following way:
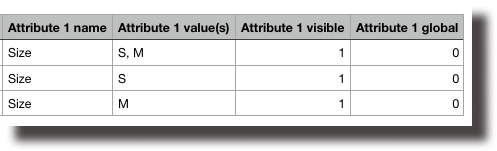
- Change the Type product as ‘variable’, and fill in the 2 new rows with ‘variation’. Add SKU data to the variation rows to look like in the example.

- Fill in the data to the other columns of the new rows as well.
- Don’t forget to add SKU data for all of the rows in the Parent column. It is used to map the parent product for the variations.

4. Save the file.
5. Go to All Products on your website and import the updated file.
6. Check in Update existing products and proceed with the import process.

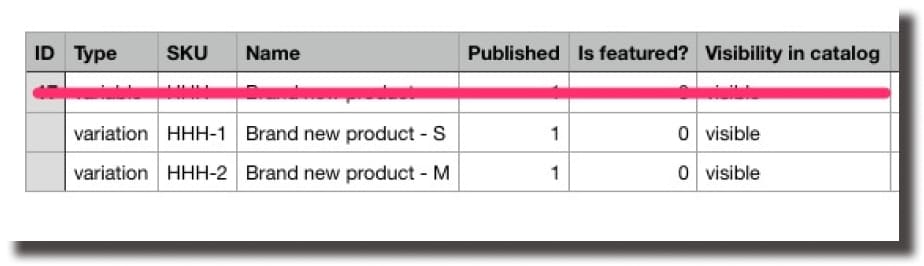
7. Go to that product and make sure the product type was changed to the variable. You will see that a new attribute was added and no variations were created.
8. Go back to the file and remove the initial parent row. The variation rows should stay as they are.
9. Save the file and proceed with the import to the site again like in the previous step, but without checking in the Update existing product checkbox.
10. Check that product again and make sure it is a variable product with variations.

Here are 3 ways to add data to your WooCommerce store using CSV files. That saves you time from adding or updating big amounts of data manually.